It's been a week now since my husband and I began the large task of building a mudroom in our garage. I'm actually surprised at how quickly the room is coming together.
I took tons of pictures of the progress and can't wait to show you all what the mudroom looks like today!
This is the door from our garage. The door we use coming and going. It leads you directly into our kitchen/family room combo. It drives me CRAZY because there is nowhere to put coats, shoes, and backpacks. The plan is to build a small mudroom beyond this door in our garage to serve as storage for all that STUFF!

Okay I know this looks really really bad...but this is our garage. That is the door that leads into our house and where our new mudroom will go.
The first thing we did was begin building a platform for the mudroom.
What you don't see here is that we put a vapor barrier and insulation under the subfloor.
Then we started framing out our walls.
We had to carry that heavy wall through our messy garage.
Yes, that's me all bundled up looking chic as ever! It was freezing cold that day
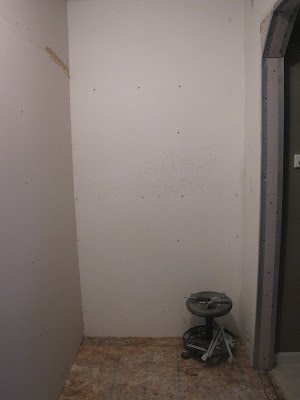
We added heavy insulation to make sure the room will stay warm. This is the view from inside the house.
Saturday my husband had a friend come over and help hang drywall and move the interior door.
My husband added this arch to match the rest of the doorways in our house.
Our new entrance.
The view from inside garage.
Our new entry from garage to mudroom.
It's hard to believe we accomplished all that in one week!
This week we my husband will be focusing on mudding and sanding the interior drywall to make the walls look flawless. Fingers crossed that in another week I can primer and paint the walls.
Amy
linking up this week to...


That is so awesome! I can't wait to see how you organize and decorate the space.
ReplyDeleteLori : )
Thrifty Decor Mom
Looking forward to painting and organizing!
DeleteWow, I'm impressed! Such a great idea to use the extra space in your garage. :)
ReplyDeleteThis looks amazing! I never thought of adding a mud room inside the garage. I can't beleive you did that in a week! It will be so nice though to not have coats and shoes all over the floor inside.
ReplyDeleteVisiting from the DIY Showoff link party.
I cannot wait for the room to be finished and everything put away. No more stuff all over our kitchen!
DeleteI can't wait to see the final look!
ReplyDeleteAlready your follower hopping by, blogging @ Why?
Awesome!! Can't wait to see the final look!!
ReplyDeleteThis is amazing. What a great idea. It looks beautiful. I have a link party called Wednesdays Adorned From Above Blog Hop and would love to have you share this and any other posts with everyone. It runs from Tuesday night through midnight Sunday. Here is the link to the party.
ReplyDeletehttp://www.adornedfromabove.com/2013/01/wednesdays-adorned-from-above-blog-hop_22.html
Debi and Charly @ Adorned From Above
That is awesome!!! Wow! Looking forward to seeing more! ;)
ReplyDeleteYou are off to a great start! You will love your new space! Can't wait to see the next step!
ReplyDeleteHow did you attach the posts to the floor? Did you have to cut holes and fill with cement? Did you follow any directions of sorts for this, if so where? Do you have any problems heating the room? Sorry for all the questions but I'm hoping to do the same thing in my garage.
ReplyDeleteThere are brackets that hold the supports they are drilled into cement. We used thick insulation in the exterior walls and floor to keep the room warm and that seems to have done the trick. With the super cold winter we've had the room has stayed about same temp as rest of our house. Good luck with your mudroom!
DeleteLooks great - thinking about doing the same thing. What are the dimensions of the room? Floor, walls
ReplyDeleteHi Amy! Quick question, what are the interior dimensions of your finished mudroom walls? I have a similar space but trying to gauge width/length of the room needed! Thank you, it looks great!
ReplyDelete