Showing posts with label Basement makeover. Show all posts

Thursday, January 23, 2014

Basement update

Okay I know I'm not the only one who is sick to death of all this snow and freezing cold temperatures! My kids have had seven snow days so far and so many delays I've lost track. We haven't had a normal day this week and I'm sure they'll have a delay again tomorrow. It makes me want to pack up and move somewhere warm...like Hawaii {I've watched too much  Hawaii Life recently}! Only 55 more days until spring!

Now that I've ranted about how much I hate winter let me show you some pics of our basement/family room/game room/home theater {if you can't tell it serves many purposes}. I recently realized that ever since I moved my craft space upstairs and my husband moved the new pool table downstairs I hadn't shared any updated photos. You can see the original basement reveal here.

Since then we've purchased a new sofa and rearranged some things. My husband also gave the fireplace a little makeover. This is what our basement looks like today.


Our family of five easily fits on our new sofa for movie nights.


That corner used to be my scrapbook nook. Of course it was prettier to look at, but this arrangement better suits our family. I hate the look of those gigantic arcade games, but my husband and kids like them so they stay for now!

My husband used old pallet wood to surround the dart board. He quickly learned that we pretty much stink at darts and the poor wall was beginning to look like swiss cheese. 


That's the tour of our basement. It's definitely a space for our family to play and hang out together. 

Thanks for coming by!

Amy

linking up to...

Monday, January 7, 2013

My old scrapbook nook

Before the holidays I mentioned that we were making some big changes around our home and possibly playing musical rooms again! Well we did. Take a look at what has replaced my scrapbook nook in our basement.


My husband finally got his wish and purchased a pool table! Of course the only place it would fit was the area I had been using as my scrapbook nook.

{my old scrapbook nook}


Don't feel too sorry for me just yet because I also got my wish...a scrapbook/craft area on the main level with big windows and tons of sunlight!

My husband and I came to an agreement we are both happy with. He gets his pool table and I get to take over the formal living room as my new space.

I have been wanting this room {yes I am sitting in our living room right now} since we moved here, but my stubborn husband was stuck on having a formal space. I didn't see the need for a formal room that barely gets used. Now we've reached a compromise that works for us both. So happy!

I can't show you the completed room yet it's still a work in progress, but I will definitely share some photos later this week.

During the moving process our dining room became the storage room for all my albums and supplies. So relieved to have three strong kids to help carry everything upstairs.


Thankfully the dining room didn't stay that way for very long. Everything is organized and put away for the most part.

Have a great Monday and stay warm!

                                                                                              Amy

Thursday, May 17, 2012

Basement reveal...FINALLY!

I am so happy to FINALLY be sharing my basement makeover with you today!

I got a little sidetracked by birthday parties, kids sports events, and life in general {you know how it is}. Our basement is for the most part complete and I am loving it!

If you've been following along my journey in our lower level you might remember it started off looking like this.


Now it looks like this...

The movie and video game area.


The screen pulls down for family movie nights.
I love my new repurposed bookcase and diy domino art!


Now onto the bar and snacking area!


And last but not least my favorite area in our basement, my scrapbook and craft nook!


I had a fantastic time making over our basement. I went a little out of my comfort zone using colors I've never used before like gray and red, but I am so glad that I did. Even my husband who said "don't paint the basement gray" is happy with the end result.

Have a great day!


                                                                                           Amy


Linking up at


Thrifty Decor Chick

Monday, April 30, 2012

Fun DIY domino art

Welcome back! I hope you all had an enjoyable weekend! I spent a lot of time shopping with my youngest. This coming weekend is her birthday party and we were busy tracking down all the decorations and items we need for the big day!

Today I am going to be sharing some fun artwork I made as part of my basement makeover. If you haven't been following along my journey to redo our lower level you can catch up herehere and also here!

We use our basement for playing games, family movie nights, eating and scrapbooking! If you look up multipurpose room in the dictionary it will have a picture of our basement! In keeping with the game theme I made some domino art out of scrap pieces of plywood from our garage!


I really LOVE how they turned out! This is the first wall you see when you come down the stairs and I wanted something to really catch your eye, but I also didn't want to spend any money!

We've already established that I pretty much suck stink at explaining things so I tried to take lots of pics as I went along!

I started off by cutting my pieces to size {no they didn't end up being all exactly the same size, but close enough}. I then painted them white and painted the sides black.


I used painters tape to make the line in the middle.


I cut out circles from paper and placed them on the board. I played with them awhile to see what numbers I wanted.


Once I decided on the placement I used a pencil to trace around the circles.


Then I painted in everything with black craft paint.


Lastly I used some of the gray wall paint on a wet rag and wiped it around the boards for a more distressed finish.


Can't wait to finish up all my basement projects and show you the completed room!

Have a great Monday!

Don't forget another Whimsy Wednesday link party will go live tomorrow evening!

                                                                                       Amy


linking up to serenity now

Thursday, April 26, 2012

Theatre sign tutorial

Today I am going to be sharing with you how I made my THEATRE sign for our basement! If you missed the work I've been doing in our basement you can check it out herehere and here.

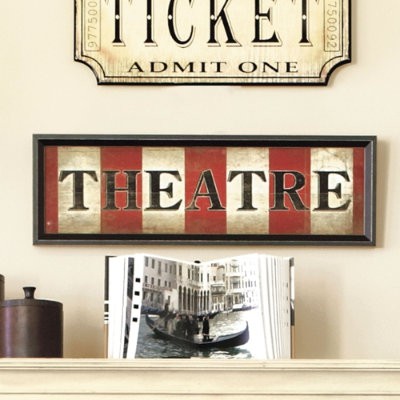
It all started when I found this one from Ballard designs on Pinterest {I looked today and it is no longer available}.


I knew this sign was the perfect fit for the basement vision I had in mind. Unfortunately even though I HEART Ballard designs very much my wallet doesn't feel the same way. I knew I could create something myself using this as my inspiration piece.

Here is what I came up with...


I've shared in the past how I made my wood signs. If you missed that tutorial you can check it out here.

I apologize to begin with because I am not the greatest at explaining things.

I started my project with just a scrap piece of wood we had on hand. 
First I painted the entire piece black {I wanted a black border and black letters}. 
Then I used painters tape and taped off the border around the edges so no other paint got on it.
I cut out my vinyl letters with my Cricut machine and placed them out on the board. 
I measured and marked where the lines would go between the red and white and used painters tape to mark the lines.
I adhered the vinyl letters in the red boxes first
Then I painted on the red paint {it took about three coats}
Once the red paint dried I removed the painters tape {not the tape around the edges} and the vinyl letters
Then I did the same thing with the white 

I know it sounds confusing. I promise it was really easy. Here are some pics I took as I was working.


I think I'm a little addicted to making my own signs, but my theory is it's better to make something yourself then go out and buy it.

Hope you all have a fun and relaxing weekend! My plans include garage sales, party planning & shopping, Church, and a soccer game!


                                                                                     Amy

Bookcase reveal

You do not even know how HAPPY these bookcases make me!
Goodbye clutter hello pretty and organized!

If you remember last week I started here.


I cleared out the clutter and used fabric to pretty it up!


Tuesday I took a very fun field trip {with the hubby-extra bonus} to one of my favorite places Ikea! I purchased several packages of storage boxes to house our large DVD collection. I also purchased some larger boxes to hide puzzles and smaller games. So now it looks like this...


So excited with how the basement makeover is coming along!
paint basement
redo/organize bookcases
fix up bar area
reorganize scrapbook nook
make artwork for entry wall

Can't wait to share each project with you as I tackle our messy basement!

Forgot to mention that I also made the THEATRE sign above the bookcases {yes, I do have to make one for each room}. Tomorrow I will share how I made it. 

Thanks for stopping by today!

                                                                                         Amy

Linking up to