Monday, April 22, 2013

Pinterest challenge red velvet poke cake

I'm back today with another pinterest challenge! I love when I finally get up off my bottom and do something I've pinned off of Pinterest. 

This weekend we hosted a small cookout for our families and it motivated me to try one of the many recipes I've pinned. I decided on the yummy and colorful red velvet poke cake! I want to stress that this is not my creation or original idea, the creator of this cake is the country cook. You can check out her blog, she has tons of great recipes!

My nine year old daughter helped me put this together and it was easy and fun to do!


All the ingredients minus the eggs and oil used to bake the cake. The original recipe calls for cheesecake pudding mix, but our store didn't have that so I used white chocolate pudding.

1 box red velvet cake mix
eggs, oil, and water for cake mix
two boxes {3.4 oz.} cheesecake instant pudding mix
4 cups milk {for the pudding}
1 tub whipped topping
10 oreo cookies crushed


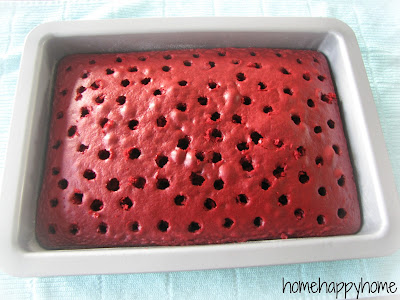
Step 1 bake the cake. While it cooled my helper crushed the oreo cookies.


Step 2 make the pudding.


Step 3 use the end of a spoon or other utensil to poke holes in the cake. Another fun one for little helpers!


Step 4 pour pudding onto cake and try to get down into holes.


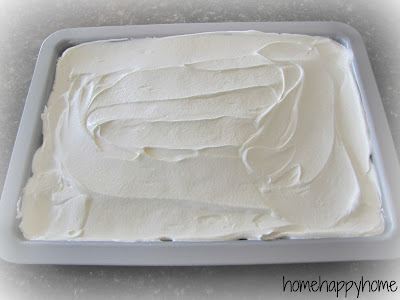
Step 5 put on a layer of whipped topping.


Step 6 right before serving sprinkle on the crushed cookies.


It's hard to tell here, but the pudding really does go down into the cake.

This was YUMMY!

Everyone enjoyed the cake and my daughter wants to make another one soon!


Have a great day!

                                                                                        Amy


Linking up this week to...
Friday, April 12, 2013

Colorful spray painted lids

I just wanted to pop in today with a simple and quick way to add a splash of color in your kitchen!


I picked up these inexpensive jars at Target {around $15.00 for all three}. Here is the before.


I knew I needed some color in our white kitchen so I grabbed the lids and gave them a few coats of spray paint. It literally took me about two minutes. The hard part was being patient while they dried!


I know it sounds silly, but those little jars make me smile!

Have a great weekend!

                                                                                         Amy


linking up this week to...

Wednesday, April 10, 2013

Inside my baking cabinet

Last week I shared our newly renovated kitchen, and today I want to share the inside of one of my cabinets. I like to call it the baking cabinet {why yes I do name my cabinets} because I keep all of my baking items {mixing bowls, measuring cups, etc.} there.


I took down the door and gave the back several coats of chalkboard spray paint. My husband put some cup hooks on a thin piece of leftover trim which I then spray painted to match the door. I used my hot glue gun to attach the trim to the door. 

This really comes in handy now that my daughter enjoys baking as well. Everything we need is located in one area and the chalkboard could also be used to write down recipes for her.


I love these little polka dot measuring cups. I just picked them up at Michael's on clearance for 60% off.


Have a great day!


                                                                                       Amy


linking up this week at...

Monday, April 8, 2013

New roof

Last week was our spring break and we were blessed with some nice weather {finally}! We also had a new roof put on our house last week. Four days of loud banging and hammering...so glad it is done.

Our old roof wasn't terrible, but we had a lot of damaged shingles due to the strong winds we had last summer. We were also excited to get a different color and style of shingles.


The house looks so much different now!

Looking forward to some warm weather this week and getting outside to work on some landscaping and garden clean up.


                                                                                          Amy

Wednesday, April 3, 2013

Kitchen reveal

I'm am thrilled to finally be sharing our kitchen makeover with you today! Our counter tops were delivered last week and my husband had them installed in one afternoon. Now our kitchen is {mostly} complete!

We had a tight budget to complete our entire kitchen on which had to include all new appliances. Luckily I have an extremely handy husband who did all of the work himself and saved us a lot of dinero. 

We spent just around $5,000 for everything! The largest part of our budget went towards new appliances {$3,000}. We spent the rest of our budget {$2,000} on everything else. The largest portion of that budget went towards new stock cabinet s and new laminate counter tops.

I can't wait any longer...here is my new favorite room in our house.


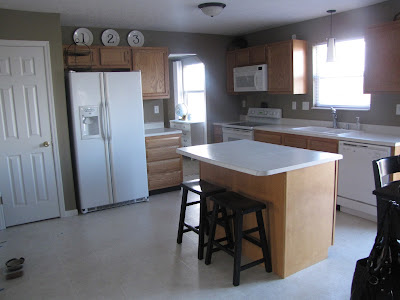
Now let's take a look at where we started this journey. If you missed earlier posts about our renovation you can find them hereherehereand lastly here.


Our pantry was way too small and that empty wall was underutilized. 


We removed all of the cabinets on the frig wall and moved our new refrigerator down slightly to make room for what would become our new larger pantry.


We {well mostly my husband} removed the old pantry.


Then my husband built a new larger corner pantry.


We also added new stock cabinets to that empty wall.


Some crown molding, paint, and new counter tops complete the room.


This side of the room stayed mostly the same.


We did remove the cabinet over the microwave and add a larger one.


My husband cut out the doors and added glass to the cabinets over the microwave. He also added interior lights inside the cabinet.

We replaced the faucet and light over the sink. I love the look of our new laminate counter tops. 


 I couldn't find a great before photo of our island, this is during appliance swapping.


My husband added wainscoting and trim to the island and then I painted it black. We liked the idea of the island being a different color then the rest of the cabinets.


BEFORE

AFTER


I am beyond thrilled with our new kitchen. Of course there are things we would still like to do in the future such as a tile backsplash and new flooring, but we are happy for now!

The best part is that we can say we did it all ourselves and didn't break the bank doing it {thanks hubby}!

                                                                                       Amy


linking up this week to...