Showing posts with label Bathroom. Show all posts

Wednesday, July 26, 2017

Stenciled floor

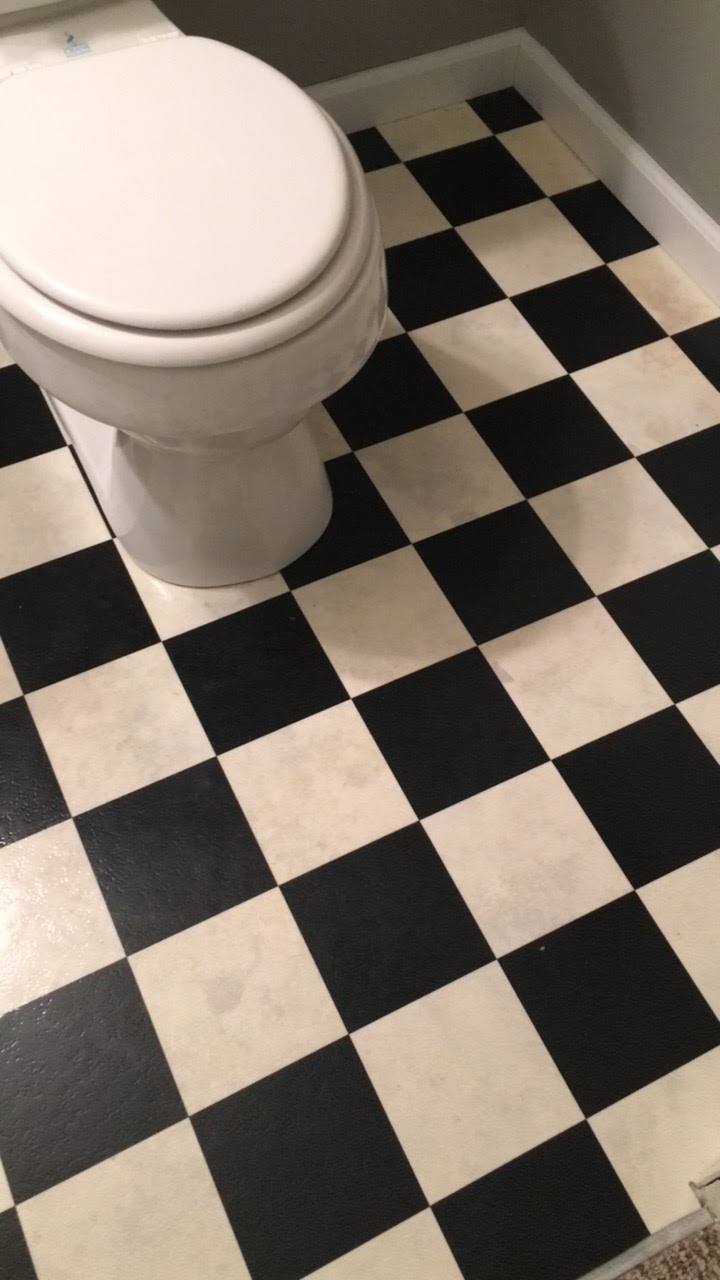
Our half bathroom in our basement had the ugliest floors. Stained vinyl the previous owners had installed. I needed an inexpensive fix and replacing them wasn't an option. 

I'm addicted to Instagram and saw several people that had chalk painted their vinyl or linoleum flooring and it looked fantastic. I figured it couldn't get any worse so I gave it a try and holy smokes the difference is amazing!  


Here is what the old floor looked like. 


Step one was cleaning and then priming the floors. I used some leftover primer from another project and rolled it on with a paint roller.


I let the primer dry for several hours and then painted on the base coat color. I used 
Rust-oleum Chalked paint in charcoal. I found mine at Menards (link)

I used a small roller to roll on the paint and angled brush to get in the corners.


I let the base color dry overnight.


The next morning I started on the stenciling. This part took me all morning and afternoon to complete. I used painters tape on the edge of the stencil and lightly rolled on the Chalked Linen White paint with a small roller. 

My advice is take your time, don't rush, and wear some knee pads.


There were spots where the paint bled through the stencil. After everything dried I used a tiny paintbrush to do touch-ups. 


The third day I used a matte finish polyurethane and did three coats on the floor, letting it dry completely in between coats. This one is my favorite (link)


I love the floors and since I have leftover paint I'm thinking about stenciling the floors in my laundry room as well. I'll keep you posted. 


Linking to the following


Monday, April 25, 2016

Half bath makeover with industrial shelves

After recently repainting part of our main floor I decided our little half bath needed an update as well. 

It was still nice, but I was over the stripes and wanted a different look.


I started by sanding down the edge of each stripe. Then I painted the room smooth stone by Glidden. 

We added industrial shelving on the back wall above the toilet (love them to pieces).  We changed out the light fixture and added a wood frame around our existing standard build mirror. Lastly I added some new fun touches to the room.

AFTER


I stained the wood shelving and mirror frame with Min wax classic gray stain. We used Liquid Nail to attach the wood the mirror. 

Sorry this room is so small it's hard to get a good photo. 


Total budget for this room was under $200
Paint was leftover
shelving and mirror supplies $90.00
Light (found here) $30.00
Artwork/ decorations $70.00


linking up to the following...


Wednesday, February 5, 2014

our master bathroom


If you've been following my blog for awhile you may have realized that I have never showed you our master bathroom. Well there was a reason...it was a boring, neglected space that I never had the energy or money to tackle. Until last week!

I still didn't have a huge budget to work with, but being stuck indoors with all this snow I finally had the free time to work on it!

I spent three days just painting. Day one I painted all the trim, day two I painted the vanity and door, day three I painted the walls! It is amazing what a can of paint can do!

Here are some BEFORE pics of our master bathroom.


I loved the size of our master bathroom just not the finishes. The yellow and baby blue walls weren't terrible just not for me, and the oak {sigh} well it's oak.  Finally the vanity lacked storage with that wasted space underneath.

Here are some DURING photos. Once I get started on project I have a hard time stopping and taking photos so there aren't very many.


Our bathroom and master bedroom have an opening that SOMEDAY I would like to have drywalled. Yes, that is me on the very top of the ladder painting the bathroom.


Here are the AFTER photos.


As I mentioned earlier the biggest change in the room is just paint. The trim is nice and bright now. I painted the door and vanity black. The walls are painted in Behr graceful gray.

My husband framed the existing builders mirror for me and added a new light fixture. We added some floating shelves from Ikea above the toilet for more storage and some new towels brighten up the space.

I would still like to do something with the windows above the tub...maybe frame them out...not sure yet {open to suggestions}. In the future I would love to replace the flooring as well! 

For now I am enjoying our relaxing and peaceful new space!

Have a great day!

Amy


linking up this week to...

Monday, November 18, 2013

DIY towel holder...kids bathroom

 
When we first moved to our home 2.5 years ago I painted and decorated the "kids bathroom" with things we already had {you can see it here}. I really had no decorating budget since all of our savings went into our down payment. It's been fine, but about a month ago one of my angels somehow broke the towel holder that I had made for them. Since then their towels have been piling up everywhere and driving me crazy!

I decided their bathroom needed more color as well so I ran to Target and picked up a colorful new shower curtain! Then I got to work on a new towel holder.

I want to add that I got this idea from my super creative mom!


I started off with a wood table leaf {from my mom's garage}.
 
 
I measured the wood and then divided it into five sections marking it lightly with pencil. I cut out vinyl numbers with my Cricut {you could always use stickers} and then applied them onto the wood.
 
 
I grabbed some paint and found some colors that worked with the new shower curtain. I used foam brushes to paint each section making sure not to blend the colors and to keep the edges a little rough {not too perfect}.
 
 
Once the paint dried I gently peeled off the vinyl.
 
 
My husband helped me attach the hooks and then hang up the new towel holder.
 
 
I only have three kids but this gives them extra space for wet swim suits in the summer!


I only spent $10.00 on this project since the only thing I had to purchase were the hooks!
 
Of course now I have to buy some cute new towels and maybe some new artwork. Plus I'm not loving that khaki wall color anymore. I'm sure this isn't the last post you will see about my kids bathroom.
 
I've got a lot of other things going on with a couple rooms in our home right now so I'm not sure when I'll get around to working more on the kids bathroom, but atleast for now there won't be any wet towels on the floor!
 
Thanks for stopping by!
 
Amy
 
Linking up this week to...