Thursday, September 26, 2013

Friday favorites

I thought it would be fun to share some of my favorite finds from Pinterest this week!
 
My family knows I am slightly addicted to Pinterest. It's my go to activity when I'm sitting at a dance class or martial arts practice. I'm the mom on her phone or tablet pinning away!
 
So here are some items that grabbed my attention this week. Please remember DO NOT pin them from my blog follow the source link to pin {thank you}!


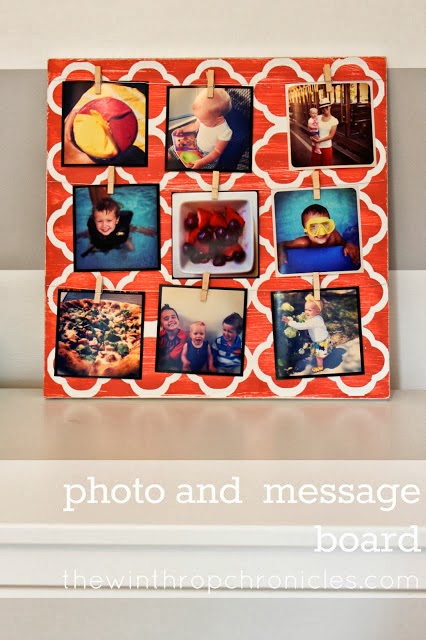
 I love displaying photos of my kids and this photo/message board was so sweet.


 I'm always on the lookout for new recipes to make for my family. Even with one picky eater in our bunch I think this would be a good one to try.
 
 
 I love this vertical fall sign for a front porch.
 
 
 I absolutely love rustic wood signs.
 
 
 House rules on the staircase...genius! I wish we didn't have carpet on our stairs, I would totally do something like this!
 
 
 This Halloween mantel is perfect. Love the banner across the front and the branch with blackbirds.
 
 
 Pretty painted address pumpkins with ribbons. I've never painted a pumpkin before, but I'm really thinking it now.
 
 
 This would look darling on a front door instead of the typical fall wreath plus it's budget friendly {always a plus}.
 
 
 Distressed dresser with upcycled door plates and knobs.


I hope you enjoyed checking out some of my friday favorite finds from Pinterest.
 
You can find me on Pinterest here.
 
Have a great weekend!
 
Amy
 

Monday, September 23, 2013

Bright and cheery budget laundry room makeover

Thanks for coming back today to check out my laundry room makeover. I worked hard all weekend to get it completed {plus I had clothes to wash}!
 
Before I jump right to the reveal I want to give you a little background on the room. When we toured our home over two years ago the laundry room was one of the selling features for me. I had dreamed of having a spacious second floor laundry room for over a decade. In our previous home our laundry room was a creepy, dark, unfinished room in the far corner of our basement. So imagine my joy when I saw this second floor laundry room, it even had sunlight!
 
As excited as I was to have this new laundry room the décor wasn't really my taste. I've lived with it for the past couple years because I didn't have the funds to spend on a room that really nobody saw but me. Basically it was at the bottom of my to do list. I finally decided about a month ago that I was going to do the room anyway...funds or no funds it was getting a makeover!
 
Since I'm a stay at home wife and mom I do about 99.99% of the laundry {although I did teach all three of my children how to work the washer and dryer over the summer}. So I figured this is really MY room to do what I want with.
 
So with little to no budget I set out to make this room my own!
 
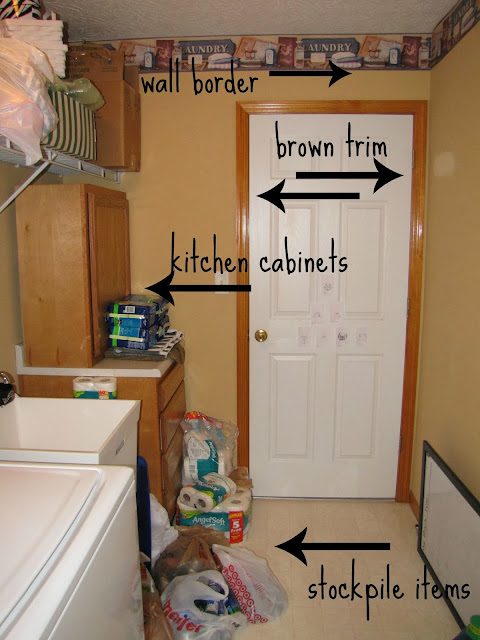
Brace yourself for the before pics...it became kind of a catch all.


I know it was bad...country wallpaper border and window treatment, brown trim, leftover cabinets from our kitchen renovation, crazy amounts of clutter, not to mention my growing stockpile from couponing.
 
Here is what I came up with...


To save money I used leftover paint from our mudroom and my daughter's room.


I had my husband add a second set of wire shelves above the existing one to help organize my stockpile. We already had these laying around our garage so no cost!
 
 
I added a wood shelf above the washer and dryer for storage and to hide all those cords and wires. I found the wood in my parents barn and we already had some trim. The only thing I purchased were the iron brackets {50% off at Hobby Lobby @ $9.00 for two}.
 
 
I purchased some colorful fabric and ribbon {again at Hobby Lobby on sale} to make a skirt for my sink. I DO NOT sew so I used iron on hem tape for the edges and used my hot glue gun to attach everything to the sink!
 
 
Can't find the match to your sock...not a problem anymore!
Lost and found pallet board...free!
 
 
I used frames I already had and a little spray paint!
 
 
I fell in love with this cute printable...you can find it here.
 
 
The leftover kitchen cabinet got a makeover and I used chalkboard stickers to label the drawers.
 
 
The white baskets used to be in my daughter's room {I almost got rid of them last year}. I used the same chalkboard stickers to label them.
 
 
To brighten up the other side of the room I added a fabric window valance {of course it's made with iron on hem tape and hot glue}, a colorful paper banner, and some pallet artwork.


Just for fun some side by side comparisons...
 
 
I ended up spending around $65.00 total for the entire room! I had to get creative on my budget and use things I already had or make them myself.
 
I'm thrilled with how the room turned out! Now I have a HAPPY place to do laundry and an organizational system for our stockpile.
 
Now time for me to get some laundry done!
 
Have a wonderful day!
 
                                                                                                      Amy
 
 
linking up this week at...


TDC Before and After

Thursday, September 19, 2013

Check your pockets laundry room sign

Today I want to share a fun project that I recently whipped up for my laundry room. The same laundry room that currently looks like a tornado hit because I've been working on giving it a much needed makeover {stuff everywhere right now}! I'm hoping to put the finishing touches on it over the weekend and reveal it on Monday {no pressure}.
 
Until then I'm going to share the sign I made for the new space.


Supplies needed;
Wood plaque, glass jar, twine or string {you could use wire}, stickers, and paint.
 
Step 1 give the wood a coat of paint in the color you want your words to be {I used white}.
 
Step 2 decide the placement of your jar and drill two holes {this is where your twine will go through}.
 
Step 3 place stickers on board {I cut letters out of vinyl on my Cricut}.
 
Step 4 make sure letters are attached securely and then paint entire board {I used spray paint}.
 
Step 5 after paint has dried peel off stickers.
 
Step 6 attach hanger to back.
 
Step 7 wrap twine around the jar and then put through the holes. Pull it tight and then tie in knot.
 
Now I have a place to stick all that loose change and odds and ends I find in the washer and dryer! Best part I spent less than $4.00 for everything!


I hope you will come back on Monday to check out my brighter and happier laundry space!
 
                                                                                          Amy


Linking up to...


Monday, September 16, 2013

Country living fair

Yes, I'm still here! Sorry I've been a bit busy and didn't have time to get around to blogging last week. I started working on another mini room makeover and I'm hoping to get it finished this week!

Friday my partner in crime {aka my mom} and I made the two hour drive north to Columbus for the Country Living Fair! This was my second year to go, but I think we will make it a yearly tradition from now on!

So many creative ideas to look at there and soooo many people! I tried to take some photos for you but sometimes it was just impossible because of the crowds. 


One of my favorite things were the initials cut out of books. Super cute idea, but the DIYer in me just couldn't pay $22. With the right tools maybe I could do this....
 
Lot's of graphic pillows
 
 
Magnets and folded books


What's not to love here?
 
 
What did I return home with? An old red letter C {random I know}, a monogram A necklace made from a domino, one perfectly shaped white pumpkin, and ton's of inspiration for future projects!
 
Can't wait to go back again next year!
 
Did any of you make it to the show in Columbus? If so what did you find?
 
Have a great day!
 
                                                                                               Amy